This article was written by FUNKYE (Chen Jianbin), the main programme of an Internet company in Hangzhou.
Preface
The last release of the direct connection method of seata configuration, you can see the details of this blog
We then go on the basis of the previous article to configure nacos to do configuration centre and dubbo registry.
Preparation
- First of all, go to the nacos github to download the latest version
- after the download, very simple, unzip to the bin directory to start on it, see as shown in the picture on it:
- start finished visit:http://127.0.0.1:8848/nacos/#/login
Did you see this interface? Enter nacos (account password is the same), go in and take a look.
At this time you can find that there is no service registration
Don't worry, let's get the seata service connected.
Seata configuration
- Go to seata's conf folder and see this ?
That's it, edit it: !
- Then remember to save it! Next we open the registry.conf file to edit it:
registry {
  # file 、nacos 、eureka、redis、zk、consul、etcd3、sofa
  type = "nacos"

  nacos {
    serverAddr = "localhost"
    namespace = ""
    cluster = "default"
  }
  eureka {
    serviceUrl = "http://localhost:8761/eureka"
    application = "default"
    weight = "1"
  }
  redis {
    serverAddr = "localhost:6379"
    db = "0"
  }
  zk {
    cluster = "default"
    serverAddr = "127.0.0.1:2181"
    session.timeout = 6000
    connect.timeout = 2000
  }
  consul {
    cluster = "default"
    serverAddr = "127.0.0.1:8500"
  }
  etcd3 {
    cluster = "default"
    serverAddr = "http://localhost:2379"
  }
  sofa {
    serverAddr = "127.0.0.1:9603"
    application = "default"
    region = "DEFAULT_ZONE"
    datacenter = "DefaultDataCenter"
    cluster = "default"
    group = "SEATA_GROUP"
    addressWaitTime = "3000"
  }
  file {
    name = "file.conf"
  }
}

config {
  # file、nacos 、apollo、zk、consul、etcd3
  type = "nacos"

  nacos {
    serverAddr = "localhost"
    namespace = ""
  }
  consul {
    serverAddr = "127.0.0.1:8500"
  }
  apollo {
    app.id = "seata-server"
    apollo.meta = "http://192.168.1.204:8801"
  }
  zk {
    serverAddr = "127.0.0.1:2181"
    session.timeout = 6000
    connect.timeout = 2000
  }
  etcd3 {
    serverAddr = "http://localhost:2379"
  }
  file {
    name = "file.conf"
  }
}
After all the editing, we run nacos-config.sh, and the content of our configured nacos-config.txt is sent to nacos as shown in the figure:
The appearance of the above similar code is an indication of success, then we log in to the nacos configuration centre to view the configuration list, the appearance of the list as shown in the figure shows that the configuration is successful:
see it, your configuration has all been committed, if then git tool run sh does not work, try to edit the sh file, try to change the operation to the following
for line in $(cat nacos-config.txt)

do

key=${line%%=*}
value=${line#*=}
echo "\r\n set "${key}" = "${value}

result=`curl -X POST "http://127.0.0.1:8848/nacos/v1/cs/configs?dataId=$key&group=SEATA_GROUP&content=$value"`

if [ "$result"x == "true"x ]; then

  echo "\033[42;37m $result \033[0m"

else

  echo "\033[41;37 $result \033[0m"
  let error++

fi

done


if [ $error -eq 0 ]; then

echo  "\r\n\033[42;37m init nacos config finished, please start seata-server. \033[0m"

else

echo  "\r\n\033[41;33m init nacos config fail. \033[0m"

fi
- At present, our preparations are all complete, we go to seata-service/bin to run the seata service it, as shown in the figure on the success!
Debugging
- first springboot-dubbo-mybatsiplus-seata project pom dependency changes, remove zk these configurations, because we use nacos to do the registry.
   <properties>
   	<webVersion>3.1</webVersion>
   	<project.build.sourceEncoding>UTF-8</project.build.sourceEncoding>
   	<project.reporting.outputEncoding>UTF-8</project.reporting.outputEncoding>
   	<maven.compiler.source>1.8</maven.compiler.source>
   	<maven.compiler.target>1.8</maven.compiler.target>
   	<HikariCP.version>3.2.0</HikariCP.version>
   	<mybatis-plus-boot-starter.version>3.2.0</mybatis-plus-boot-starter.version>
   </properties>
   <parent>
   	<groupId>org.springframework.boot</groupId>
   	<artifactId>spring-boot-starter-parent</artifactId>
   	<version>2.1.8.RELEASE</version>
   </parent>
   <dependencies>
   	<dependency>
   		<groupId>com.alibaba.nacos</groupId>
   		<artifactId>nacos-client</artifactId>
   		<version>1.1.4</version>
   	</dependency>
   	<dependency>
   		<groupId>org.apache.dubbo</groupId>
   		<artifactId>dubbo-registry-nacos</artifactId>
   		<version>2.7.4.1</version>
   	</dependency>
   	<dependency>
   		<groupId>org.apache.dubbo</groupId>
   		<artifactId>dubbo-spring-boot-starter</artifactId>
   		<version>2.7.4.1</version>
   	</dependency>
   	<dependency>
   		<groupId>org.apache.commons</groupId>
   		<artifactId>commons-lang3</artifactId>
   	</dependency>
   	<dependency>
   		<groupId>com.alibaba</groupId>
   		<artifactId>fastjson</artifactId>
   		<version>1.2.60</version>
   	</dependency>
   	<!-- <dependency> <groupId>javax</groupId> <artifactId>javaee-api</artifactId>
   		<version>7.0</version> <scope>provided</scope> </dependency> -->
   	<dependency>
   		<groupId>io.springfox</groupId>
   		<artifactId>springfox-swagger2</artifactId>
   		<version>2.9.2</version>
   	</dependency>
   	<dependency>
   		<groupId>io.springfox</groupId>
   		<artifactId>springfox-swagger-ui</artifactId>
   		<version>2.9.2</version>
   	</dependency>

   	<!-- mybatis-plus begin -->
   	<dependency>
   		<groupId>com.baomidou</groupId>
   		<artifactId>mybatis-plus-boot-starter</artifactId>
   		<version>${mybatis-plus-boot-starter.version}</version>
   	</dependency>
   	<!-- mybatis-plus end -->
   	<!-- https://mvnrepository.com/artifact/org.projectlombok/lombok -->
   	<dependency>
   		<groupId>org.projectlombok</groupId>
   		<artifactId>lombok</artifactId>
   		<scope>provided</scope>
   	</dependency>
   	<dependency>
   		<groupId>io.seata</groupId>
   		<artifactId>seata-all</artifactId>
   		<version>0.9.0.1</version>
   	</dependency>
   	<!-- <dependency> <groupId>com.baomidou</groupId> <artifactId>dynamic-datasource-spring-boot-starter</artifactId>
   		<version>2.5.4</version> </dependency> -->

   	<!-- <dependency> <groupId>com.baomidou</groupId> <artifactId>mybatis-plus-generator</artifactId>
   		<version>3.1.0</version> </dependency> -->
   	<!-- https://mvnrepository.com/artifact/org.freemarker/freemarker -->
   	<dependency>
   		<groupId>org.freemarker</groupId>
   		<artifactId>freemarker</artifactId>
   	</dependency>
   	<!-- https://mvnrepository.com/artifact/com.alibaba/druid-spring-boot-starter -->
   	<dependency>
   		<groupId>com.alibaba</groupId>
   		<artifactId>druid-spring-boot-starter</artifactId>
   		<version>1.1.20</version>
   	</dependency>
   	<!-- 加上这个才能辨认到log4j2.yml文件 -->
   	<dependency>
   		<groupId>com.fasterxml.jackson.dataformat</groupId>
   		<artifactId>jackson-dataformat-yaml</artifactId>
   	</dependency>
   	<dependency> <!-- 引入log4j2依赖 -->
   		<groupId>org.springframework.boot</groupId>
   		<artifactId>spring-boot-starter-log4j2</artifactId>
   	</dependency>
   	<!-- https://mvnrepository.com/artifact/mysql/mysql-connector-java -->
   	<dependency>
   		<groupId>mysql</groupId>
   		<artifactId>mysql-connector-java</artifactId>
   	</dependency>
   	<dependency>
   		<groupId>org.springframework.boot</groupId>
   		<artifactId>spring-boot-starter-web</artifactId>
   		<exclusions>
   			<exclusion>
   				<groupId>org.springframework.boot</groupId>
   				<artifactId>spring-boot-starter-logging</artifactId>
   			</exclusion>
   			<exclusion>
   				<groupId>org.slf4j</groupId>
   				<artifactId>slf4j-log4j12</artifactId>
   			</exclusion>
   		</exclusions>
   	</dependency>
   	<dependency>
   		<groupId>org.springframework.boot</groupId>
   		<artifactId>spring-boot-starter-aop</artifactId>
   	</dependency>
   	<dependency>
   		<groupId>org.springframework.boot</groupId>
   		<artifactId>spring-boot-starter-test</artifactId>
   		<scope>test</scope>
   	</dependency>
   	<!-- <dependency> <groupId>org.scala-lang</groupId> <artifactId>scala-library</artifactId>
   		<version>2.11.0</version> </dependency> -->
   	<dependency>
   		<groupId>org.springframework.boot</groupId>
   		<artifactId>spring-boot-configuration-processor</artifactId>
   		<optional>true</optional>
   	</dependency>
   </dependencies>
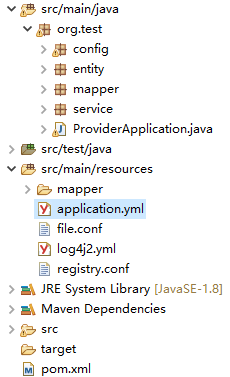
- Then change the directory structure of test-service, delete the configuration of zk and change the application.yml file, directory structure and code.
server:
  port: 38888
spring:
  application:
    name: test-service
  datasource:
    type: com.alibaba.druid.pool.DruidDataSource
    url: jdbc:mysql://127.0.0.1:3306/test?useUnicode=true&characterEncoding=UTF-8&serverTimezone=UTC
    driver-class-name: com.mysql.cj.jdbc.Driver
    username: root
    password: 123456
dubbo:
  protocol:
    loadbalance: leastactive
    threadpool: cached
  scan:
    base-packages: org。test.service
  application:
    qos-enable: false
    name: testserver
  registry:
    id: my-registry
    address:  nacos://127.0.0.1:8848
mybatis-plus:
  mapper-locations: classpath:/mapper/*Mapper.xml
  typeAliasesPackage: org.test.entity
  global-config:
    db-config:
      field-strategy: not-empty
      id-type: auto
      db-type: mysql
  configuration:
    map-underscore-to-camel-case: true
    cache-enabled: true
    auto-mapping-unknown-column-behavior: none
3.then change the registry.conf file, if your nacos is another server, please change it to the corresponding ip and port.
 registry {
  type = "nacos"
  file { name = "file.conf
    name = "file.conf"
  }
   zk {
    cluster = "default"
    serverAddr = "127.0.0.1:2181"
    session.timeout = 6000
    connect.timeout = 2000
  }
    nacos {
    serverAddr = "localhost"
    namespace = ""
    cluster = "default"
  }
 }
 config {
  type = "nacos"
  file { name = "file.conf
    name = "file.conf"
  }
  zk {
    serverAddr = "127.0.0.1:2181"
    session.timeout = 6000
    connect.timeout = 2000
  }
    nacos {
    serverAddr = "localhost"
    namespace = ""
    cluster = "default"
  }
 }
- Next, we run provideApplication
The startup is successful, and we look at the seata logs: !
[20191202212028 20191202212028
Success, this time we are the same, to modify the contents of the test-client, first of all the same application.yml, zk replaced by nacos, here will not describe in detail, the test-service within the registry.conf, copy to the client project resources to cover the original registry.conf.
Then we can run clientApplication: !
- Confirm that the service has been published and test that the transaction is running correctly
The service is successfully published and consumed. Now let's go back to swagger and test the rollback to see if everything is ok, visit http://127.0.0.1:28888/swagger-ui.html
Congratulations, see this must be as successful as me!
Summary
About the use of nacos and seata simple build has been completed, more detailed content hope you visit the following address to read the detailed documentation