Seata can support multiple third-party configuration centres, so how is Seata compatible with so many configuration centres at the same time? Below I will give you a detailed introduction to the principle of Seata Configuration Centre implementation.
Configuration Centre Property Loading
In Seata Configuration Centre, there are two default configuration files:
!
file.conf is the default configuration properties, and registry.conf mainly stores third-party registry and configuration centre information, and has two main blocks:
registry {
# file, nacos, eureka, redis, zk, consul, etcd3, sofa
# ...
}

config {
# file, nacos , apollo, zk, consul, etcd3
type = "file"
nacos {
serverAddr = "localhost"
namespace = ""
}
file {
name = "file.conf"
}
# ...
}
The registry is the configuration attribute of the registry, which is not mentioned here, and the config is the value of the attribute of the configuration centre, which is of type file by default, i.e., it will load the attributes inside the local file.conf, and if the type is of any other type, it will load the value of the configuration attribute from the third-party configuration centre.
In the core directory of the config module, there is a configuration factory class ConfigurationFactory, which has the following structure:
!
You can see that there are some static constants for configuration:
REGISTRY_CONF_PREFIX, REGISTRY_CONF_SUFFIX: the name of the configuration file, the default configuration file type;
SYSTEM_PROPERTY_SEATA_CONFIG_NAME, ENV_SEATA_CONFIG_NAME, ENV_SYSTEM_KEY, ENV_PROPERTY_KEY: custom filename configuration variables, which also indicates that we can customise the configuration centre's property files.
There is a static code block inside ConfigurationFactory as follows:
io.seata.config.ConfigurationFactory
io.seata.config.ConfigurationFactory !
According to the custom file name configuration variable to find out the name and type of configuration file, if not configured, the default use registry.conf, FileConfiguration is the default configuration implementation class of Seata, if the default value, it will be more registry.conf configuration file to generate the FileConfiguration default configuration object, here you can also use the SPP configuration centre. Configuration object, here you can also use the SPI mechanism to support third-party extended configuration implementation, the specific implementation is to inherit the ExtConfigurationProvider interface, create a file in META-INF/services/ and fill in the full path name of the implementation class, as shown below:
!
Third-party configuration centre implementation class loading
After the static code block logic loads the configuration centre properties, how does Seata select the configuration centre and get the configuration centre property values?
As we just said FileConfiguration is the default configuration implementation class for Seata, it inherits from AbstractConfiguration, which has a base class Configuration and provides methods to get parameter values:
short getShort(String dataId, int defaultValue, long timeoutMills);
int getInt(String dataId, int defaultValue, long timeoutMills);
long getLong(String dataId, long defaultValue, long timeoutMills); int getInt(String dataId, int defaultValue, long timeoutMills); long getLong(String dataId, long defaultValue, long timeoutMills);
So that means that all that is needed is for a third party configuration centre to implement this interface and integrate into the Seata Configuration Centre, I'll use zk as an example below:
First, the third-party configuration centre needs to implement a Provider class:
!
The provider method, as its name suggests, mainly outputs a specific Configuration implementation class.
So how do we get the corresponding third-party Configuration Centre implementation class based on the configuration?
In the Seata project, this is how to get a third-party Configuration Centre implementation:
Configuration CONFIG = ConfigurationFactory.getInstance(); ``java
In the getInstance() method the singleton pattern is mainly used to construct the configuration implementation class, which is constructed as follows:
io.seata.configuration.ConfigurationFactory#buildConfiguration:
!
First of all, the static code block in ConfigurationFactory gets the configuration centre used by the current environment from the CURRENT_FILE_INSTANCE created by registry.conf, which is of type File by default. We can also configure other third-party configuration centres in registry.conf. We can also configure other third-party configuration centers in registry.conf. Here, we also use the SPI mechanism to load the implementation class of the third-party configuration centre, the specific implementation is as follows:
!
As above, that is what I just said ZookeeperConfigurationProvider configuration implementation output class, let's take a look at this line of code:
EnhancedServiceLoader.load(ConfigurationProvider.class,Objects.requireNonNull(configType).name()).provide();
``

The EnhancedServiceLoader is the core class of the Seata SPI implementation, and this line of code loads the class names of the files in the `META-INF/services/` and `META-INF/seata/` directories, so what happens if more than one of these Configuration Centre implementation classes are loaded?

We notice that the ZookeeperConfigurationProvider class has an annotation above it:

```java
@LoadLevel(name = "ZK", order = 1)
When loading multiple Configuration Centre implementation classes, they are sorted according to order:
io.seata.common.loader.EnhancedServiceLoader#findAllExtensionClass:
!
io.seata.common.loader.EnhancedServiceLoader#loadFile:
!
In this way, there is no conflict.
But we find that Seata can also use this method for selection, and Seata passes a parameter when calling the load method:
Objects.requireNonNull(configType).name()
ConfigType is the configuration centre type, which is an enumerated class:
public enum ConfigType {
 File, ZK, Nacos, Apollo, Consul, Etcd3, SpringCloudConfig, Custom.
}
We notice that there is also a name attribute on the LoadLevel annotation, which Seata also does when filtering implementation classes:
!
If the name is equal to LoadLevel's name attribute, then it is the currently configured third-party configuration centre implementation class.
Third-party configuration centre implementation class
ZookeeperConfiguration inherits AbstractConfiguration and has the following constructor:
!
The constructor creates a zkClient object, what is FILE_CONFIG here?
private static final Configuration FILE_CONFIG = ConfigurationFactory.CURRENT_FILE_INSTANCE;
It turns out to be the registry.conf configuration implementation class created in the static code block, from which you get the properties of the third-party Configuration Centre, construct the third-party Configuration Centre client, and then implement the Configuration interface:
!
Then you can use the relevant methods of the client to get the corresponding parameter values from the third-party configuration.
Third-party configuration centre configuration synchronization script
I wrote it last weekend and submitted it to PR, it's still under review, and it's expected to be available in Seata 1.0, so please look forward to it.
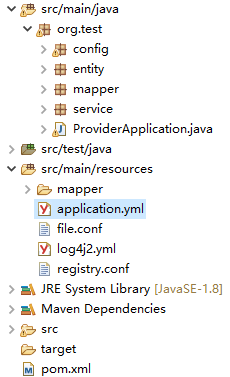
It's located in the script directory of the Seata project:
!
config.txt is a locally configured value, after setting up the third-party configuration centre, running the script will sync the config.txt configuration to the third-party configuration centre.
Author's Bio
Zhang Chenghui, currently working in the technology platform department of the information centre of Zhongtong Technology, as a Java engineer, mainly responsible for the development of the Zhongtong messaging platform and the all-links pressure test project, loves to share technology, author of WeChat's public number "Backend Advancement", and technology blog (https://objcoding.com/) Blogger, Seata Contributor, GitHub ID: objcoding.